Note: This page isn't finished yet because I haven't finished the project. But I'm making it live as a reminder of what I still need to do.
Early in the first Covid lockdown we started watching Lego Masters on 4oD (I hate calling it All 4). While watching it I wondered what I would make if I made a big Lego project. I decided I would probably try to make a faithful recreation of the boardgame HeroQuest, that my brother and I played constantly in our youth. As there wasn't much to do during lockdown I decided to go for it and began planning it out.
Not long after I started working on it I wondered if anyone else had the same idea and beaten me to it. A quick Google later I found that actually a Lego HeroQuest set had been submitted to Lego Ideas by KingGloriousSquirrel (here is an interview with him). His set looked great, but I wanted to do a scaled back version that was as much like the original game as I could manage. Mainly because I thought it would be easier and cheaper (less pieces), and I'd already started working on my design.
Two years and a significant amount of money later, here are the results of my project.
The Board
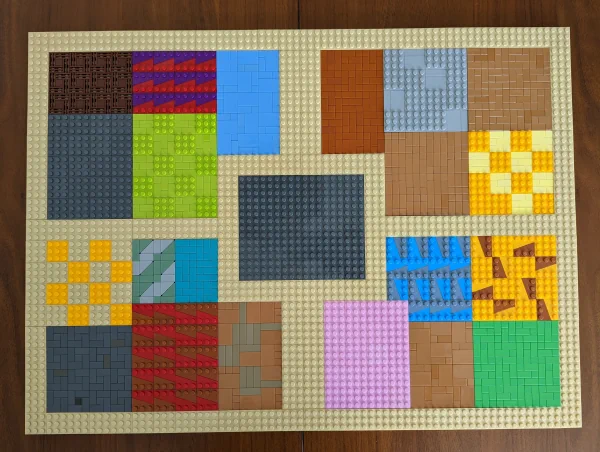
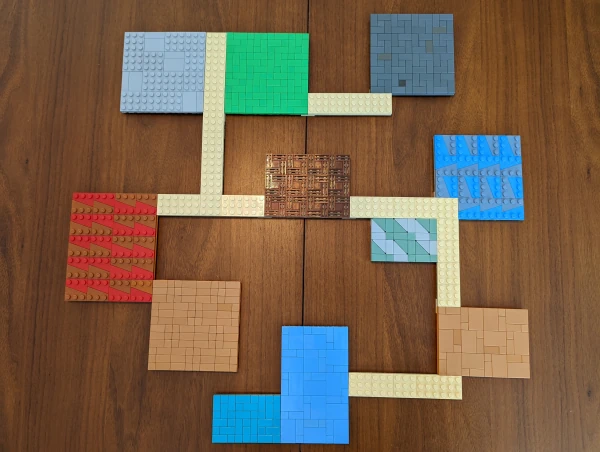
Example custom layout using modular pieces.
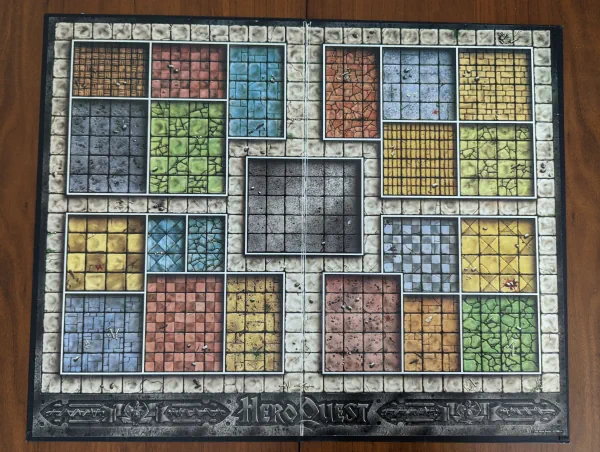
The HeroQuest board probably took up the majority of my time. I had trouble working out how big it should be. In the end I decided to make each square on the board equivalent to a 3 x 3 lego plate (a 3 studs by 3 studs square). 2 x 2 was too small to fit the pieces in next to each other comfortably. And 4 x 4, which may have looked nicer and made it easier to build furniture for, and easier to create nice tile patterns on, would have just resulted in a massive board. And I wanted to ensure my board would actually fit on my table.
I also wanted to make the board modular, so in addition to playing regular HeroQuest you could also piece the rooms and corridors together however you wanted to make your own custom maps. Doing that with rooms and corridors made out of multiple plates would have risked things breaking apart all the time, So I wanted each room to be made out of a single plate whenever possible. Unfortunately Lego don't really make plates with odd numbers of studs (I was working to a 3 x 3 square size remember), so it involved buying bigger plates and cutting them down to size.
Custom Pieces
I started off wanting to use only normal Lego pieces, with no custom parts. But I broke that rule almost straight away when I started making the board and decided to cut the baseplates in order to make my rooms. After that I became open to using customised pieces when there really was no standard Lego that would meet my needs.
Character Stands
I tried many many Lego pieces as stands for the character pieces, but I couldn't find anything that fit nicely in a 3 x 3 square, that centred the Lego figure, and that weren't too thick that they raised the figure up comically high on the board. In the end I gave up and contacted Roger at Rog's Laser Workshop on Etsy. He cut custom sized display stands for me that work perfectly for the HeroQuest characters. I couldn't recommend them enough.